Learn API Automation Using Robot Framework in 7 days
Overview:
- This blog is specially for manual testers having basic knowledge of API testing. By following all the steps mentioned in this blog one can learn Basics of API automation using Robot framework.
- Robot Framework is a free and open-source framework for test automation. The Robot Framework Foundation presently maintains it after Nokia Networks built it.
1: Environment Setup
- Download and setup python and pip
- https://www.python.org/downloads


- Set up path in Environment Variables
- To find python path go to - C:\Users\<username>
- Click on view and tick Hidden items
- go to \AppData\Local\Programs\Python\<PythonVersion>
- Copy complete path
- Search for 'View Advanced System Settings' in windows.
- Click on Environment Variables
- Go to Systems Variables - Click New
- Enter Variable Name: PythonPath
- Enter Variable Value: C:\Users\<username>\AppData\Local\Programs\Python\<PythonVersion>\
- Again click on New and Enter Variable Name: PythonScriptsPath
- Enter Variable Value: C:\Users\<username>\AppData\Local\Programs\Python\<PythonVersion>\
Example:
C:\Users\piyush.agrawal\AppData\Local\Programs\Python\Python310\
C:\Users\piyush.agrawal\AppData\Local\Programs\Python\Python310\Scripts\
- Verify python and pip installation
- python --version
- pip --version

- Note: If you get error message python was not found then try below steps:
- Double click on path in System Variables section

- Add two new values in Path.

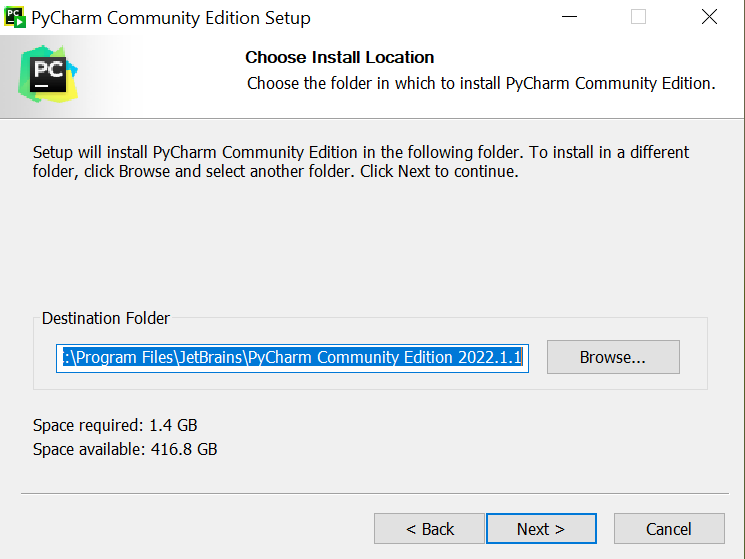
- Install PyCharm on Windows
- Go to PyCharm IDE Download
- Select Community Edition
- Follow Below Steps


- Create New Project in PyCharm


- Verify Python Version at bottom right corner (Python 3.10 in this case)

- Install Libraries
- Open Terminal in PyCharm, if you see below error then execute command
- Paste Command and press Enter: Set-ExecutionPolicy -Scope CurrentUser -ExecutionPolicy Unrestricted
- Execute command in terminal and ignore warnings:
pip install robotframework
pip install requests
pip install robotframework-jsonlibrary
pip install robotframework-requests


- YouTube Link:
Step 2: Add plugins and setting to treat .txt file to work as .robot file in PyCharm
- In PyCharm select File > Settings > Plugins > Add Plugins
- Search IntelliBot and Install
- Search CMD Support and Install
- Click Restart IDE to restart PyCharm

- Setting to treat .txt file to work as .robot file in PyCharm
- File > Settings > Editor > File Types > Robot Feature File > File Name Patterns > Click on plus button > Add Wildcard > Add *.txt and Click OK.


- YouTube Link:
Step 3: Create Basic Structure
- Delete the automatically created 'main.py' file

- Right Click on Project Name (Demo) > New > Directory > Name: API
- Right Click on API and create sub-directories - Common, Tests, Utilities

- Right Click sub-directory Common > New > File > File Name: CommonKeywords.robot
- Similarly create UrlConstants.robot and Constants.robot inside Common directory.
- Right Click sub-directory Tests> New > File > File Name: SanityTest.robot

Step 4: Alternative ways to add libraries
- We can add libraries using terminal, other way to add libraries is:
- Click on File > Settings > Project (Project:Demo) > Python Interpreter > Click on + Icon or press ALT+Insert > Enter library name (jsonpath) > select 'json-rw-ext' > Click on Install Package


Step 5:
Get Request Using Robot Framework:
Code:
*** Settings ***
Documentation       Robot Framework Get Demo

Library     Collections
Library     String
Library     JSONLibrary
Library     RequestsLibrary

*** Variables ***
${baseurl}          https://reqres.in
${page_path}        $.page

*** Test Cases ***
Test Case1: Get Request Demo
    [Tags]          Sanity
    create session  session1            ${baseurl}      disable_warnings=1
    ${endpoint}     set variable        api/users?page=2
    ${response}     get on session      session1        ${endpoint}
    log to console  ${response.status_code}
    log to console  ${response.content}
    log to console  ${response.headers}
    Log             ${response.content}

    #Validations
    ${status_code}=     convert to string       ${response.status_code}
    should be equal     ${status_code}          200

    ${json_response}=   convert string to json       ${response.content}
    ${contents}=        get value from json     ${json_response}        ${page_path}
    ${contents}=        convert to string       ${contents}
    ${contents}=        Remove String Using RegExp      ${contents}     ['\\[\\],]
    should be equal     ${contents}             2

    ${headerValue}=     get from dictionary    ${response.headers}      Content-Type
    Log                 ${headerValue}
    should be equal     ${headerValue}         application/json; charset=utf-8
Note: In Terminal, if you get the error "Cannot open Local Terminal - Failed to start Powershell.exe" then follow the steps:
- In Pycharm, Go to File > Settings > Search "Terminal" or expand Tools and click Terminal > Change Shell Path dropdown value to C:\windows\system32\cmd.exe > OK

Step 6: Post Request Using Robot FrameWork:
Code:
*** Settings ***
Documentation       Robot Framework post Demo

Library     Collections
Library     String
Library     JSONLibrary
Library     RequestsLibrary

*** Variables ***
${baseurl}          https://reqres.in
${id_path}          $.id


*** Test Cases ***

Test Case2: Post Request Demo
    [Tags]          Sanity
    create session  session1            ${baseurl}      disable_warnings=1
    ${endpoint}     set variable        api/users
    ${body}=        create dictionary   name=Rohit      job=cricketer
    ${response}     post on session      session1        ${endpoint}    data=${body}
    log to console  ${response.status_code}
    log to console  ${response.content}

    #Validations
    ${status_code}=     convert to string       ${response.status_code}
    should be equal     ${status_code}          201

    ${json_response}=   convert string to json       ${response.content}
    ${contents}=        get value from json     ${json_response}        ${id_path}
    should not be empty    ${contents}
Code Explanation:
Step 7: Put Request Using Robot FrameWork:
Code:
*** Settings ***
Documentation       Robot Framework Put Demo

Library     Collections
Library     String
Library     JSONLibrary
Library     RequestsLibrary

*** Variables ***
${baseurl}          https://reqres.in

*** Test Cases ***

Test Case3: Put Request Demo
    [Tags]          Sanity
    create session  session1            ${baseurl}      disable_warnings=1
    ${endpoint}     set variable        api/users/2
    ${body}=        create dictionary   name=Virat      job=Doctor
    ${response}     put on session      session1        ${endpoint}    data=${body}
    log to console  ${response.status_code}
    log to console  ${response.content}

    #Validations
    ${status_code}=     convert to string       ${response.status_code}
    should be equal     ${status_code}          200
Code Explanation:
Step 8: Delete Request Using Robot FrameWork:
Code:
*** Settings ***
Documentation       Robot Framework Delete Demo

Library     Collections
Library     String
Library     JSONLibrary
Library     RequestsLibrary

*** Variables ***
${baseurl}          https://jsonplaceholder.typicode.com/

*** Test Cases ***

Test Case4: Delete Request Demo
    [Tags]          Sanity
    create session  session1            ${baseurl}      disable_warnings=1
    ${endpoint}     set variable        posts/1
    ${response}     Delete on session      session1        ${endpoint}
    log to console  ${response.status_code}
    log to console  ${response.content}

    #Validations
    ${status_code}=     convert to string       ${response.status_code}
    should be equal     ${status_code}          200
Code Explanation:
Step 9: Re-Execute Only Failed Testcases in Robot Framework
- If we run suppose 10 testcases in robot file and out of 10 test cases 8 testcases are passed and we want to again executed 2 failed testcases then use:
- robot --rerunfailed output.xml --output output2.xml <PathOfFile>
- Once we re-execute this 2 failed testcases then new result file is generated having detail log of this two test case execution, now if we want to club result of this 2 execution (first execution where 8 test cases passed and second execution where we re-executed 2 testcases) result and have only 1 result file then use:
- rebot --output output.xml --merge output*.xml
Video Explanation:


Step 10: Using JSON and JsonPath
- JSON - JavaScript Object Notation - It follows key: value format
- Like we use Xpath to find out value/location of Node in HTML document, similarly we can use Json Path to find out value of key at particular location in an API response
- Consider below json object:
{
"firstName": "Piyush",
"lastName": "Agrawal",
"age": 27
}
To find value of age we can use jsonpath: $.age
Step 11: How to Load XML file and get XML Node value from XML File.
- Sometime we need to use test data that is stored in XML file in our test cases, for this we need to use XML library in our .robot file
- We have to use 'Parse XML' and 'Get Element' keyword to perform such operation with XML data.
Step 12: How to Load JSON file and get JSON value from File
- Similarly, Sometime we need to use test data that is stored in JSON file in our test cases, for this we need to use JSONLibrary, OperatingSystem in our .robot file.
- We can validate response headers and can also check the cookie value received in the response.
- As this response is received in key: value pair, we have to use 'get from dictionary' keyword for this operations.


Contact:
Email: piyushagrawal.automation@gmail.com
Follow on LinkedIn: Piyush Agrawal - LinkedIn
Follow on YouTube: Piyush Agrawal - Youtube
Comments
Post a Comment